Supported platforms: CODESYS 3.5 SAFETY
Getting started with SL8X
This chapter describes the needed installations and steps to create a small program using SL8X with MultiTool Creator and CODESYS.
Required Installations
1. CODESYS 3.5 SP19
2. Install CODESYS Safety SIL2 3.5.19.0.package
3. Install the latest Epec MultiTool Creator
For more information, refer to the Epec MultiTool Creator Manual.
4. Install the latest Epec MultiTool Diagnoser
For more information, refer to the Epec MulitTool Diagnoser Manual.
|
|
Installation packages can be found from Epec's extranet. |

Required Connections
For more information, refer to the Technical Manual & Cabling Instructions.
|
|
Technical manuals can be found from Epec's extranet. |
Programming
To get started with programming, refer to Epec Training Material.
Application can be downloaded either through Ethernet or CAN.
Using Ethernet
To log in to a control unit, the IP address is needed. By default, the IP address for Epec units is 192.168.0.2
|
|
The default IP address of the 6500 unit is 192.168.0.2. If the IP address is not known, reinstall CODESYS runtime to reset the IP address to the default value. |
The IP address of
-
-
Epec display products can be checked from the ApplicationLoader (if available).
-
Epec products with a PLCopen application can be checked with Epec MultiTool Diagnoser:
-
-
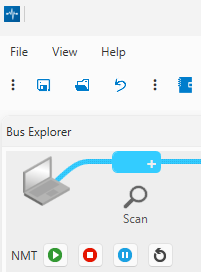
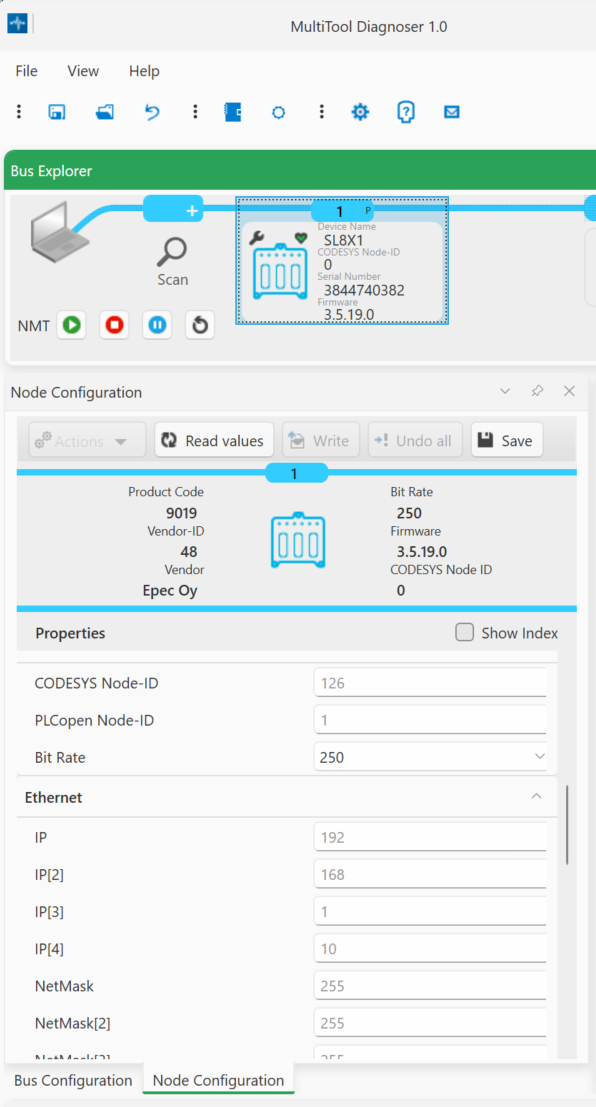
open Epec MultiTool Diagnoser
-
Click Scan icon
-
-
-
-
-
double-click the found node from CAN bus section to see the IP address (in this example, 192.168.1.10)
-
-
2. Ethernet settings for PC (click to expand)2. Ethernet settings for PC (click to expand)
|
|
Screen captures in this chapter are taken using USB-Ethernet adapter. Same settings can usually be done for laptop's physical Ethernet. |
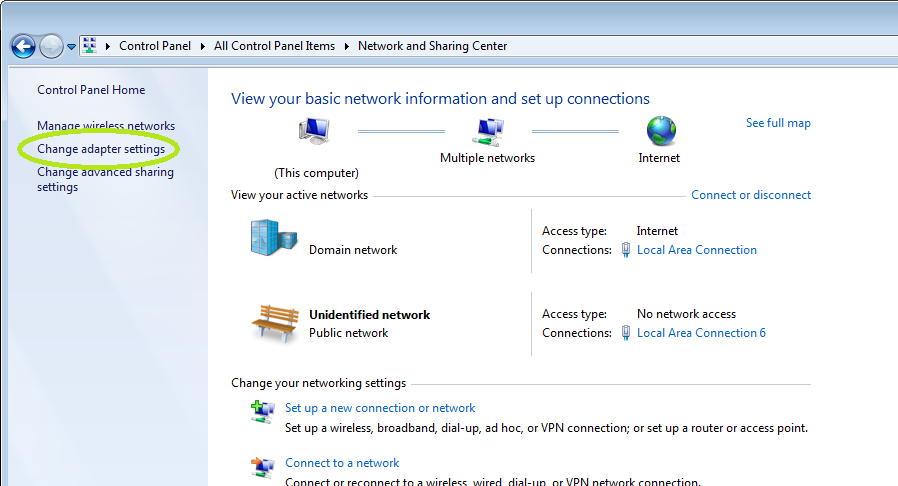
2.1 Go to Network and Sharing Center and select Change adapter settings.
2.2 Right-click the USB-Ethernet adapter (or physical Ethernet) and select Properties.
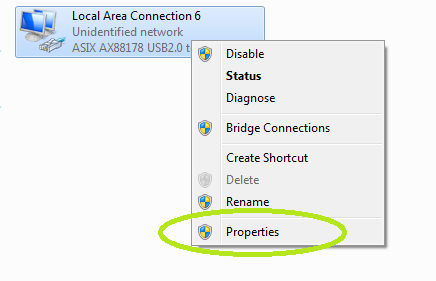
2.3 Right-click the USB-Ethernet adapter (or physical Ethernet) and select Properties.
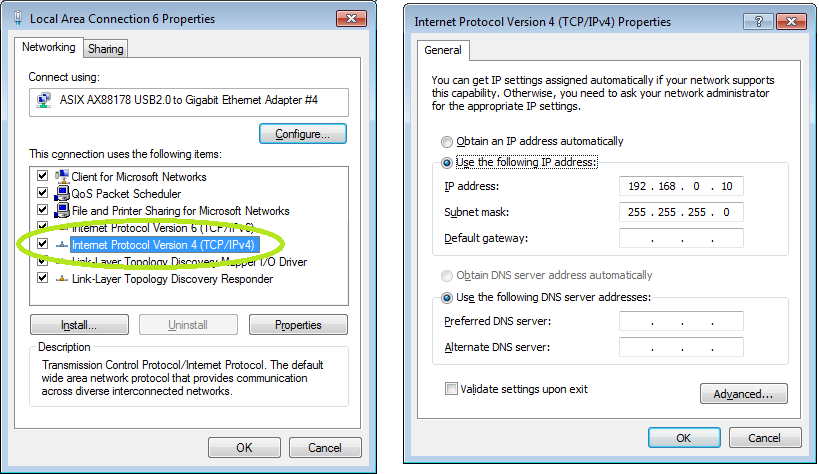
2.4 Select Internet Protocol Version 4 (TCP/IPv4) and Properties.
Define a static IP address for the adapter (Use the following IP address). The first three bytes (192.168.0.xxx) should be the same with Epec unit.
3. Connect to the unit (click to expand)3. Connect to the unit (click to expand)
1. Open CODESYS 3.5 project for an Epec unit
2. Double-click Device to open Communication Settings dialog and select Scan network...
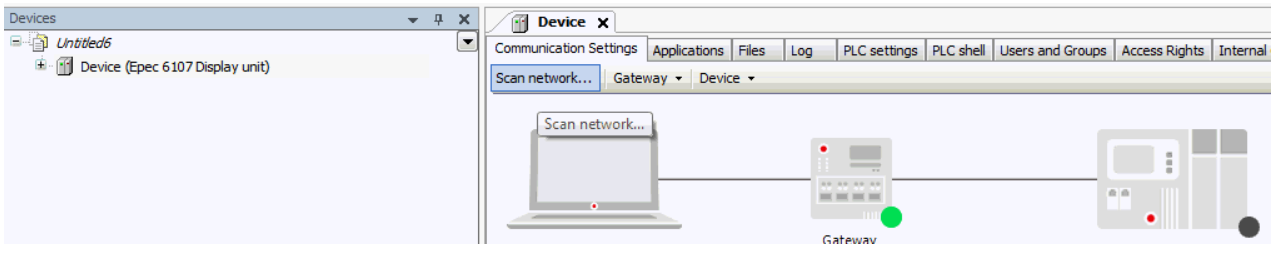
3. Select the unit and click OK.
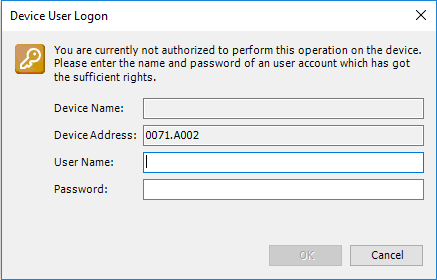
4. S Series only: the user name and password must be given in a popup before login is possible.
The user name is User and default password is last 4 digits of the control unit serial number.
See also, Known issues.
5. S Series only: CODESYS debug mode needs to be activated before new application download is possible using CODESYS IDE.
Select SIL2 > Enter debug mode.... from the menu bar. This requires SIL2 extension to be installed (see also, Safety project prerequisites).
Note, this is not required when going online with an up-to-date application.
 6. Select Online > Login from the menu bar and the application is downloaded. Click Debug > Start (F5) to run the program.
For more information, see CODESYS help (section Quickstart).
Using CAN
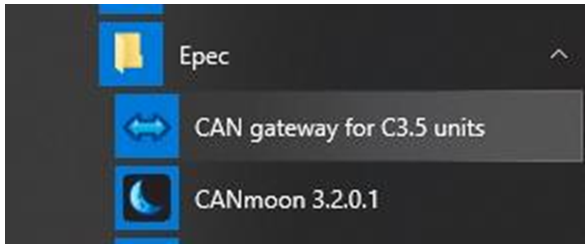
1. Go to Start menu and select Epec > CAN gateway for C3.5 units which is a program that defines the communication parameters to CODESYS gateway.
2. Define the server settings for the gateway:
-
-
Set the wanted Port value
-
Bit rate = the control unit's bit rate
-
Target node-ID = control unit's CODESYS node-ID
-
CODESYS Scan finds other node-IDs too, but communication is more reliable using right node-ID
-
-
Gateway node-ID = set node-ID that is not used by the target or any other devices connected to the bus (range 1-127)
-
Select the used CAN adapter from the drop-down list. Only adapters connected to the PC are shown on the list.
-
Select the correct CAN adapter channel from the drop-down list.
-
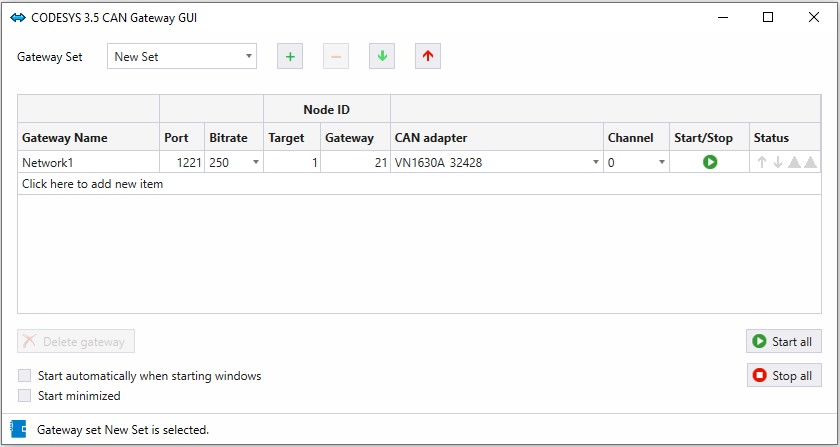
3. The gateway for CAN is now defined. Then click Start button.
6. Open CODESYS 3.5
7. Double-click the device to open Communication Settings tab. Select Gateway > Add new gateway:
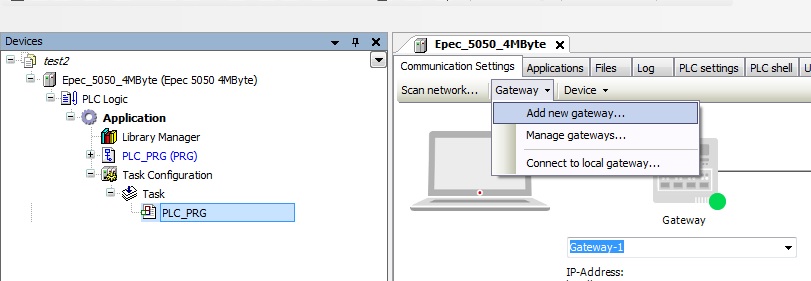
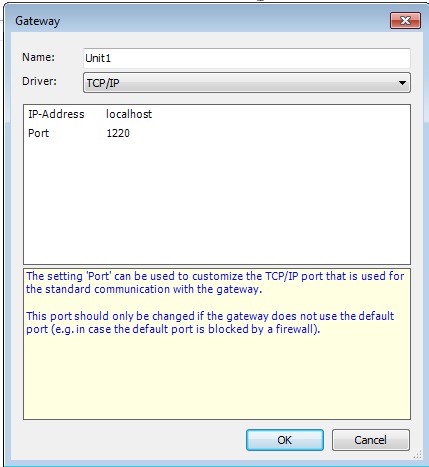
8. Define the gateway settings. The Port must be the same as given earlier in CAN gateway for C3.5 units program (step 3).
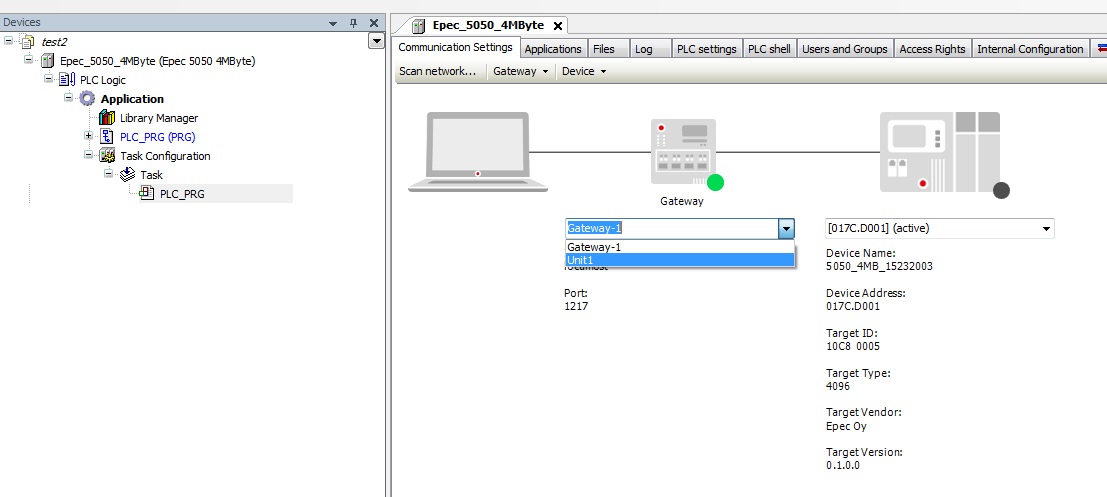
9. In Communication Settings tab, select the added gateway from the drop-down menu. The gateway indicator lamp turns green to indicate a successful connection:
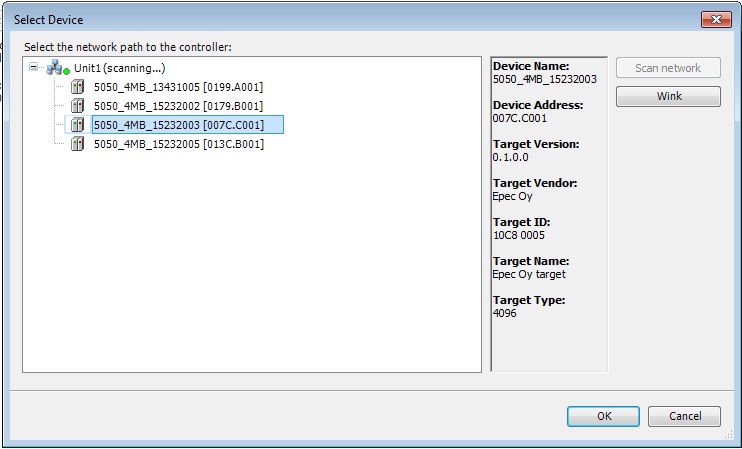
10. To ensure correct connection, click Scan network in Communication Settings tab.
Select the wanted device and check that the serial number (included to the device name) is corresponding with the control unit (found in the product label).
11. S Series only: the user name and password must be given in a popup before login is possible.
The user name is User and default password is last 4 digits of the control unit serial number.
See also, Known issues.
12. S Series only: CODESYS debug mode needs to be activated before new application download is possible using CODESYS IDE.
Select SIL2 > Enter debug mode.... from the menu bar. This requires SIL2 extension to be installed (see also, Safety project prerequisites).
Note, this is not required when going online with an up-to-date application.
13. To download the application, select Online > Login from the menu bar. To run the program, click Debug > Start (F5)