Configuring Ethernet and DNS Settings
|

|
Units with a display:
Units without a display:
|
This section describes how to set the following settings:
Ethernet:
DNS (Domain Name System):
-
disable manual DNS
-
set manual DNS addresses
|

|
If the device contains a PLCopen application, the IP address can also be changed using CANmoon software (available in Epec Extranet).
|
For 6000/X series units with a displayFor 6000/X series units with a display
To configure the Ethernet settings:
-
6107 display unit: Boot-up the display unit and press the lower right corner of the display during boot-up until the embedded ApplicationLoader software starts.
6112 and 6807 display unit: Boot-up the display unit and rub the lower right corner of the display during boot-up until the embedded ApplicationLoader software starts.
-
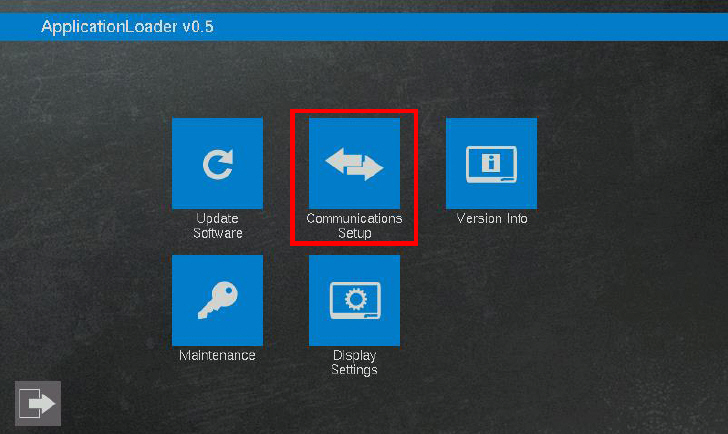
Navigate to Communication Setup view:

-
Select the wanted Ethernet mode:
-
If Static IP mode is selected, set the addresses:
-
Tap the number field to be changed. Selected field is emphasized by a background color and a number keypad pop-up opens.
-
Set the wanted numbers (max 3 numbers per field (0-255)) and tap 
-
To save the settings, tap Save.
Return to main view by tapping  in the lower left corner.
To set the DNS addresses manually:
-
6107 display unit: Boot-up the display unit and press the lower right corner of the display during boot-up until the embedded ApplicationLoader software starts.
6112 and 6807 display unit: Boot-up the display unit and rub the lower right corner of the display during boot-up until the embedded ApplicationLoader software starts.
-
Navigate to Communication Setup view:

-
Select DNS tab
-
Select Manual DNS enabled
-
To set the DNS address, tap the number field to be changed. Selected field is emphasized by a background color and a number keypad pop-up opens. Set the wanted numbers (max 3 numbers per field (0-255)) and tap 
-
To save the settings, tap Save.
Return to main view by tapping  in the lower left corner.
For 6000/X series units without a displayFor 6000/X series units without a display
Source file topic100332.htm
Last updated 4-Sep-2025
![]()
